
In this short video, I demonstrate how to make pretty but easy paper flowers, using Fabscraps Flower field stamp set.
I hope you enjoy making flowers.
Until next time, happy crafting.
Marie Smith

I hope you enjoy making flowers.
Until next time, happy crafting.
Marie Smith
Hello, fellow crafters
Today’s card-making inspiration features two techniques, using the pansy edger die by Creative Expressions.


Find our edger dies by clicking on this link.
Buy your Distress ink pads and sprays in our online store by clicking here.
Thank you for supporting where you get your inspiration from.
You can ensure that you don’t miss out on any blogs - subscribe by e-mail by entering your e-mail adress in the block in the top right-hand corner of this page.
Have a wonderful week.
Marie Smith
Hello, fellow crafters
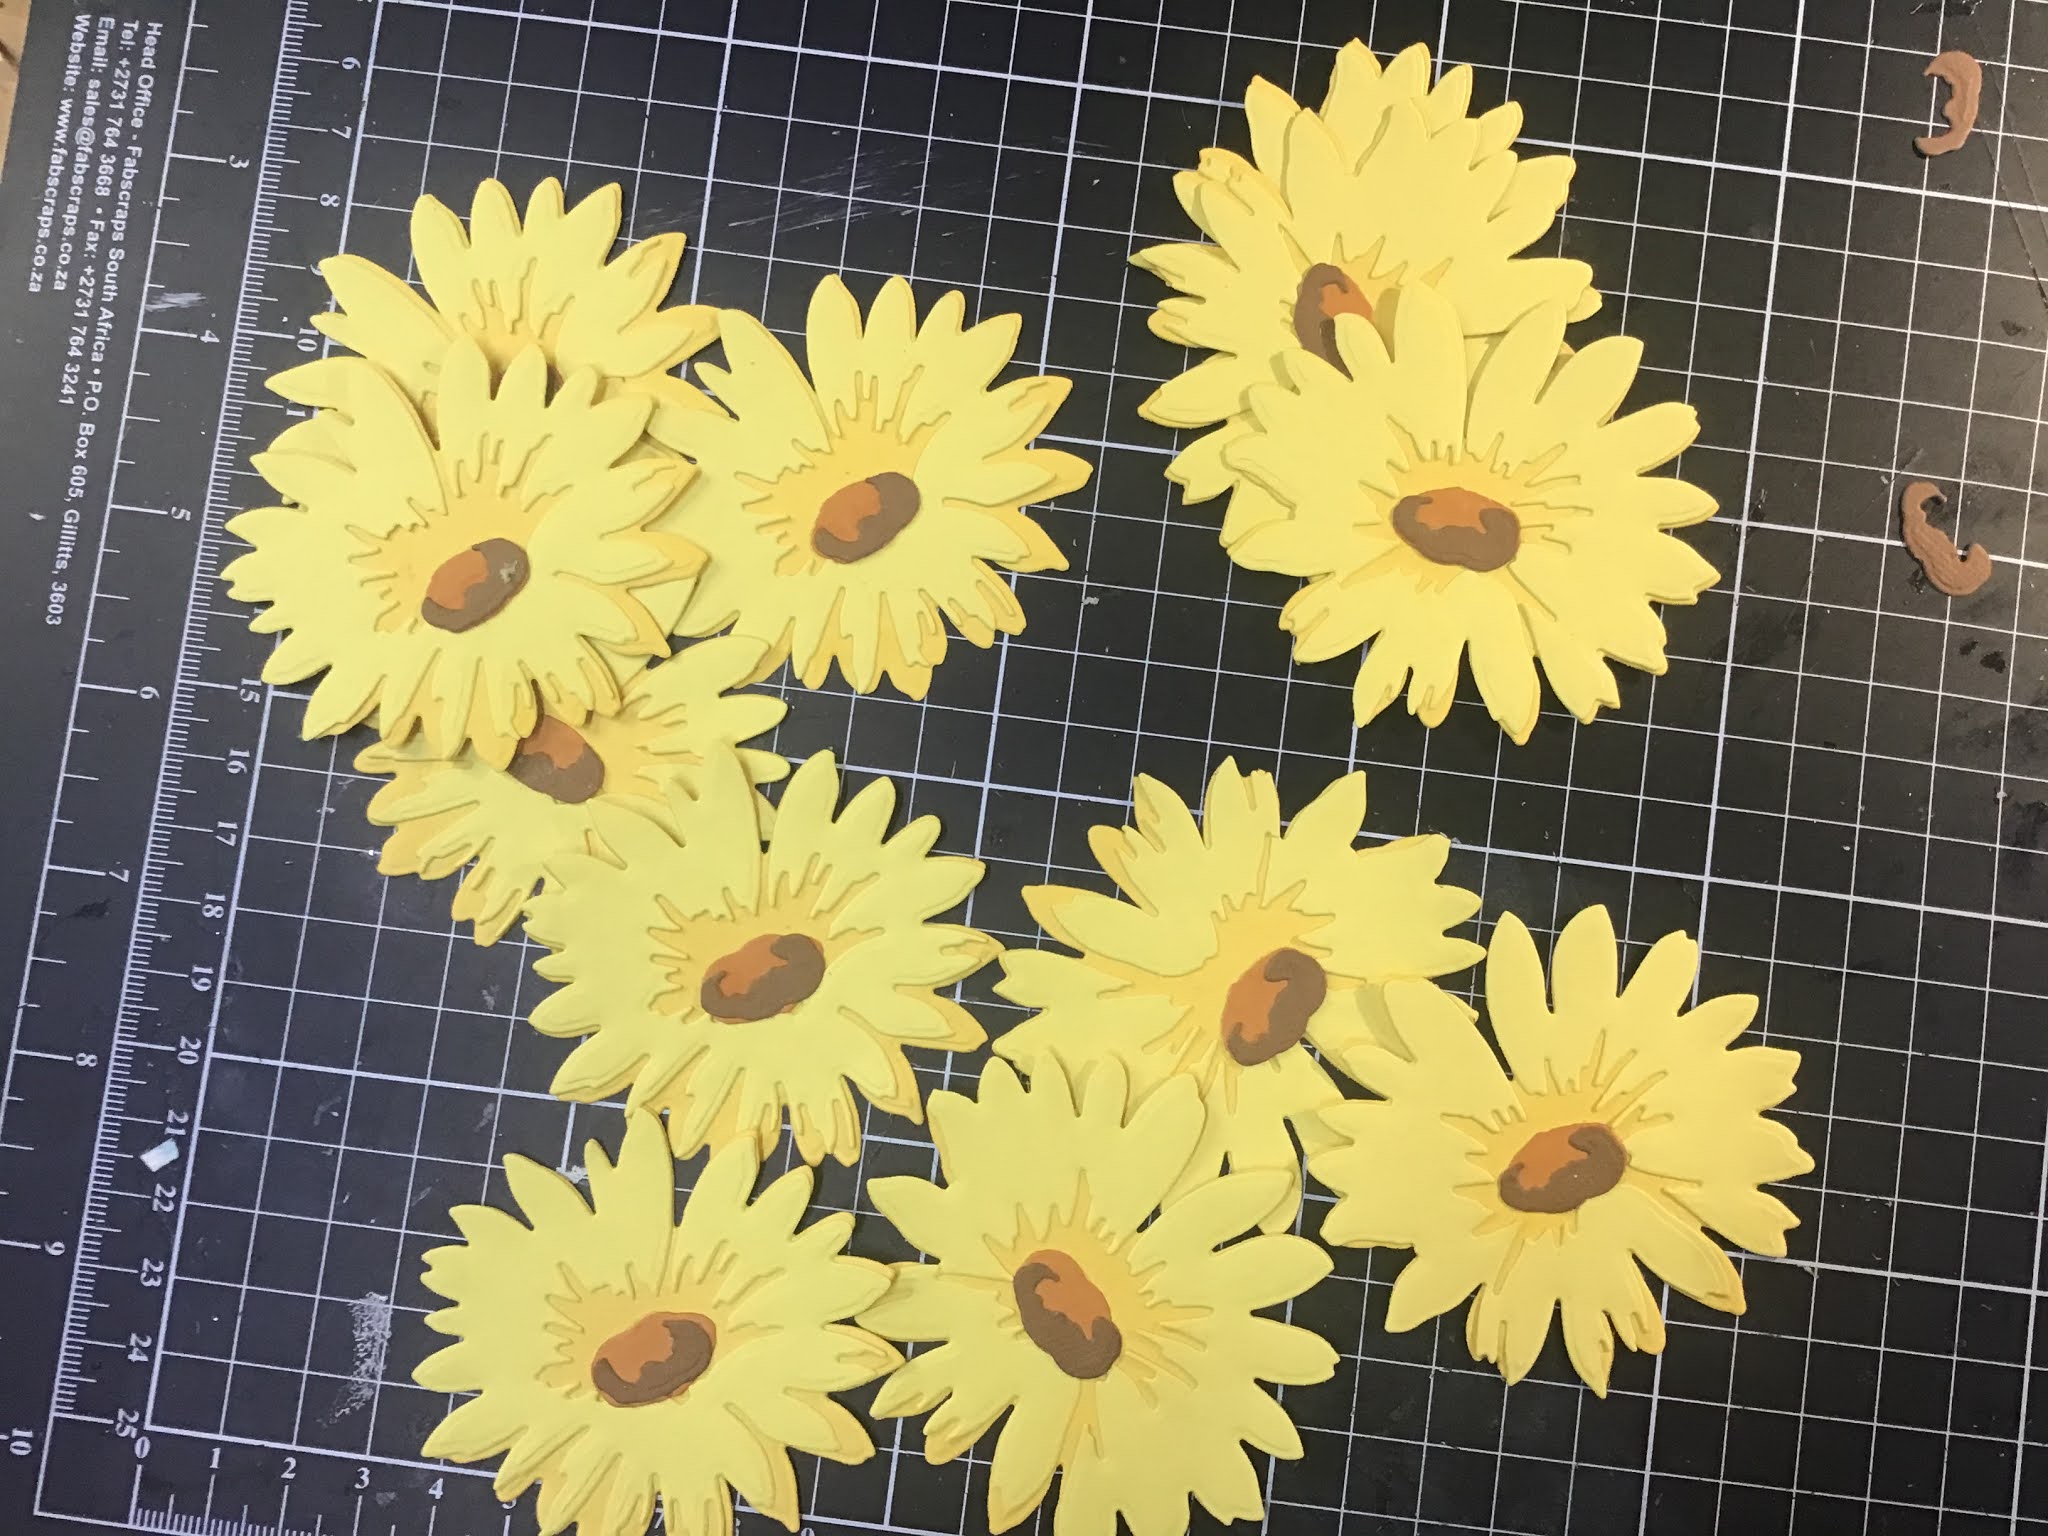
Today’s inspiration features cheerful daisies on several cards.
On the first card, the daisies are arranged in front of a sunny window on an autumn day.

I created the daisies using Altenew craft—a-flower daisy die set and two shades of yellow cardstock.
The window was cut from bronze metallic cardstock, using the Heartfelt Creations rounded sunlight window die.
The per behind the window frame is from Heartfelt Creations’ country cottage paper pack.
The daisies are created in four easy steps. Select two shades of yellow cardstock, rust and brown cardstock to cut out all the parts of the two sizes of daisies. Then simply follow the layering guide on the die package. The photos below show the steps I followed.


Today I am sharing snippets of two double-page and a single-page scrapbook layout, created using the Fabscraps C127 Take a moment paper collection.


Happy crafting, until next time.
Marie Smith
Hello, fellow crafters.
Today I am sharing an explosion memory box, featuring the fabulous C127 Take a moment paper collection by Fabscraps


This explosion memory box is perfect for preserving memories of special persons or moments. It takes up to 18 photos plus additional photos that can be inserted into the pockets on the two flaps in the smallest box. Square photos sized 9x9, 8,5x8,5 and 7,5x7,5 cm.
It is a lovely idea for a gift. For example, a Valentine’s day gift in which you can include photos, journaling about favourite songs, favourite moments, funniest moments, etc.
Consists of two smaller explosion boxes inside the largest box. Photos and/or journaling blocks can be added to both sides (inside and outside) of each of the four flaps of the boxes. However, Marie created two pockets on the inside of the smallest box, into which tags can be inserted. These tags may be used for journaling or you may adhere photos to them.
I have uploaded a video, showing bow the box opens and unfolds, to YouTube. Click here to watch the video.
You may e-mail me for instructions for this project. To qualify for the free tutorial, mention in your e-mail that you saw this on my blog. marie@purplemagnolia.co.za
Happy crafting, until next time.
Marie Smith

Whenever I need dainty flowers for a card or other papercraft project, I reach for my Heartfelt Creations tweet cherry blossoms stamp-and-die-set. one can create truly beautiful tiny blossoms with this set - suitable for lots of projects.
On this card, they are the perfect companions for the delicate lace border die by Spellbinders/Becca Feeken.
To create the special flowers on this card, I used the die set (no the stamps). They were die-cut from watercolour paper and spread out on my teflon craft sheet (glass cutting board will also work). Then I lightly spritzed them with water and used a waterbrush pen to drop some pin watercolour in the centre of each flower, allowing then paint to spread out into the water. after this, I placed them in the cherry blossom mould and rolled them through my Big Shot die-cutting machine. this shaped the flowers and all I had to do to complete them, was to let them dry and add mini flower pearls in the centres of the flowers.


Remember that you can be infomed of all my blog posts by either clicking on the "Follow"bottom at the top right-hand corner of this page, or by subscribing to receive all blog posts by e-mail.
Happy crafting, until next time.
Marie Smith


Today I am sharing a technique for creating a colourful backgrounds for the die-cuts on your cards.
I made the card using Curious metal silver ice 300gsm cardstock - my favourite cardstock for a beautiful rounded effect with die cutting.it is available in our online store. Really a cardstock worth its price.
To create the colourful background, I used the same type of cardstock because it creates a lovely shimmery effect with all kinds of ink. First, I swiped Distress Oxide inks in seedless preserves and salty ocean across the length of an A5 size piece of the cardstock.


