Friday 30 August 2019

Purple asters and lace

 What a lovely combination of papers you will find in the Heartfelt Creations wild aster paper collection.
Once you have made a few flowers, it is so quick and easy to put together pretty cards.
I stamped the flowers with deep purple archival ink then coloured them with a dauber and tge same ink by starting with circular movements around the centres of the flowers. Then I added a bit of colour with the daubers along the ends of the petals. After die-cutting with the co-ordinating dies, I shaped the flowers by curling every petal around a pencil. Layers of flowers were glued together and the flowers were completed with a few flower pearls in their centres.
The lacy edge die is from the Heartfelt Creations sweetheart set of dies.


Thank you for visiting. I hope you enjoyed the short stay-over and feel inspired to create something beautiful today.
Have a wonderful day.
Marie Smith

Pink summer aster single page layout


This was a quick and easy yet effective layout to create, using a sheet of paper from the Heartfelt Creations wild aster paper collection, a few pieces of cardstock in complementary colours and a handful of flowers made using the wild aster stamp and die sets.
I love the detail of the flowers printed in the left corner of the paper and the soft lacy pattern. To complement the lacy print, I added a lace strip that was die-cut using a Creative Expressions die.

The dragonfly on the right and the bee on the left add finishing touches. They were created using a Paper Boutique die set and left-over pieces of card from an alcohol ink background for a card.
Thank you for visiting. I hope you enjoyed your stay. Please feel free to leave a comment.
Happy crafting
Marie Smith

Monday 26 August 2019

Pink kosmos


Kosmos flowers (which flower from late summer until early autumn in South Africa and always bring special memories of my late father) created with Craft Passion flowers 06 die, Heartfelt Creations flower-making paper, leaves from Heartfelt Creations delightful daisy stamps and dies, and centres made fom air-drying clay in moulds. Altenew pan watercolours used for colouring the flowers after die-cutting.

The grooves in petals were made by lightly misting the coloured flowers and using a small groove tool.


The border die is Sophia from Die’Sire.
Clear plastic boxes provide the perfect solution for presenting your dimensional cads. These can be mailed in a padded envelope.
Craft Passion die https://www.purplemagnolia.co.za/products/pln-flowers-6
Groove tools https://www.purplemagnolia.co.za/search?type=product&q=Groove
Clear plastic boxes https://www.purplemagnolia.co.za/products/clear-boxes-for-cards-single-unit
Sophia border die https://www.purplemagnolia.co.za/products/diesire-create-a-card-sophia-ds-cad-sop?_pos=1&_sid=41be08616&_ss=r
Happy crafting
Marie Smith

Thinking of you with vellum petunia

Today’s card was quick and easy.


I used a vellum petunia from my stash of flowers, made using the Heartfelt Creations large classic petunia stamp and die set. You can see instructions for making the vellum petunias in a previous post https://purplemagnolia-papercraft.blogspot.com/2019/08/thank-you-with-dainty-vellum-flowers.html. I love making several flowers at a time and saving the extras for later.
The flower and leaves were simply adhered to a card base covered with a piece of pretty paper from the classic petunia paper collection. The sentiment was also cut from the paper pack.
Hoping you find this inspiring for making quick but pretty cards.
Remember that if you follow me by clicking on follow in the top right-hand corner of this page, you will receive e-mail notification of all my posts. You are welcome to leave a short comment on my post.
Until next time, happy crafting.
Marie Smith


Sunday 25 August 2019

Vibrant fuchsias for spring

Spring is in the air with the garden blossoming with loads of lavender blooms, bright orange clivias, the first freesia in dark burgundy and the first fuchsia flowers opening.
Today’s card was inspired by my excitement seeing the first fuchsia flowers yesterday.


 The Avery Elle hummingbird stamp and die set has been ‘hovering’ on my desk and on my online store’s display racks since last summer and my hands have been itching to use it.

I was inspired yesterday to do these lovely fuchsias and hummingbird in watercolours with heat embossing. I am a watercolour  painter (mainly flowers) and have found it difficult to find a watercolour paper that takes detailed heat embossing well. The papers of Creative Expressions are meeting the requirement.

I stamped the set of images on the watercolour paper with Versamark watermark ink and used glacier white Nuvo fine detail embossing powder. (Ranger extra fine also works very well).

Altenew watercolours are of fine quality and the pan contains absolutely lovely selection of colours.

I used water brush pens and the two fuchsia colors (second and third in the top row) and the three greens below them for the flowers. Colour was applied using the wet-on-wet technique.


The card base was prepared by blending purple and fuchsia inks on the right hand of the inside of the card, after masking off. White acrylic ink was splattered on the blended part. A border die was used on the front of the card to add interest. The watercolours used for colouring the flowers were used to add some platters on the card front.


Flowers were cut out using the dies in the set.


An Afrikaans sentiment - appropriate for so many situations -  was heat-embossed onto vellum and adhered to the card before arranging the flowers. 3D tape was used to loft the large cluster, to add dimension.

Thank you for visiting. I hope you feel inspired to create something beautiful with watercoloured flowers.

Have a wonderful day

Marie Smith

Tuesday 20 August 2019

Same die, different effects

Good morning, crafters

Today I am sharing two cards with the same background/frame die from Sunny Studios. Two totally different visual effects were created by using papers with different themes.

For the first card, I used some lovely older Fabscraps paper from a carders pack and turned the die-cut background into a shaker box. To match the botanical theme, I used green seed beads and foil flakes to fill the shaker box. I love the richness of the combination.


On the second card, I used a paper in soft blue pastel hues paper from a 6x6 Lemoncraft paper pack and some fussy-cut flowers from a Lemoncraft A4 sheet with elements for fussy cutting. 


I added several delicate leaves and twigs die-cut with two of our Fantasy dies.

Check out our range and buy your pretty papers in our online store. They just make card-making so easy. 
https://www.purplemagnolia.co.za/collections/card-kits

Fantasy dies https://www.purplemagnolia.co.za/collections/fantasy-dies

Thank you for visiting. Have an awesome day. I hope you find some crafting time.
Marie Smoth

Thursday 1 August 2019

Pink birthday peonies

 
Pink peonies are perfect to say "Happy birthday" on a special lady's birthday, or just to say "I am thinking of you". I made these cards for upcoming birthdays of two friends.


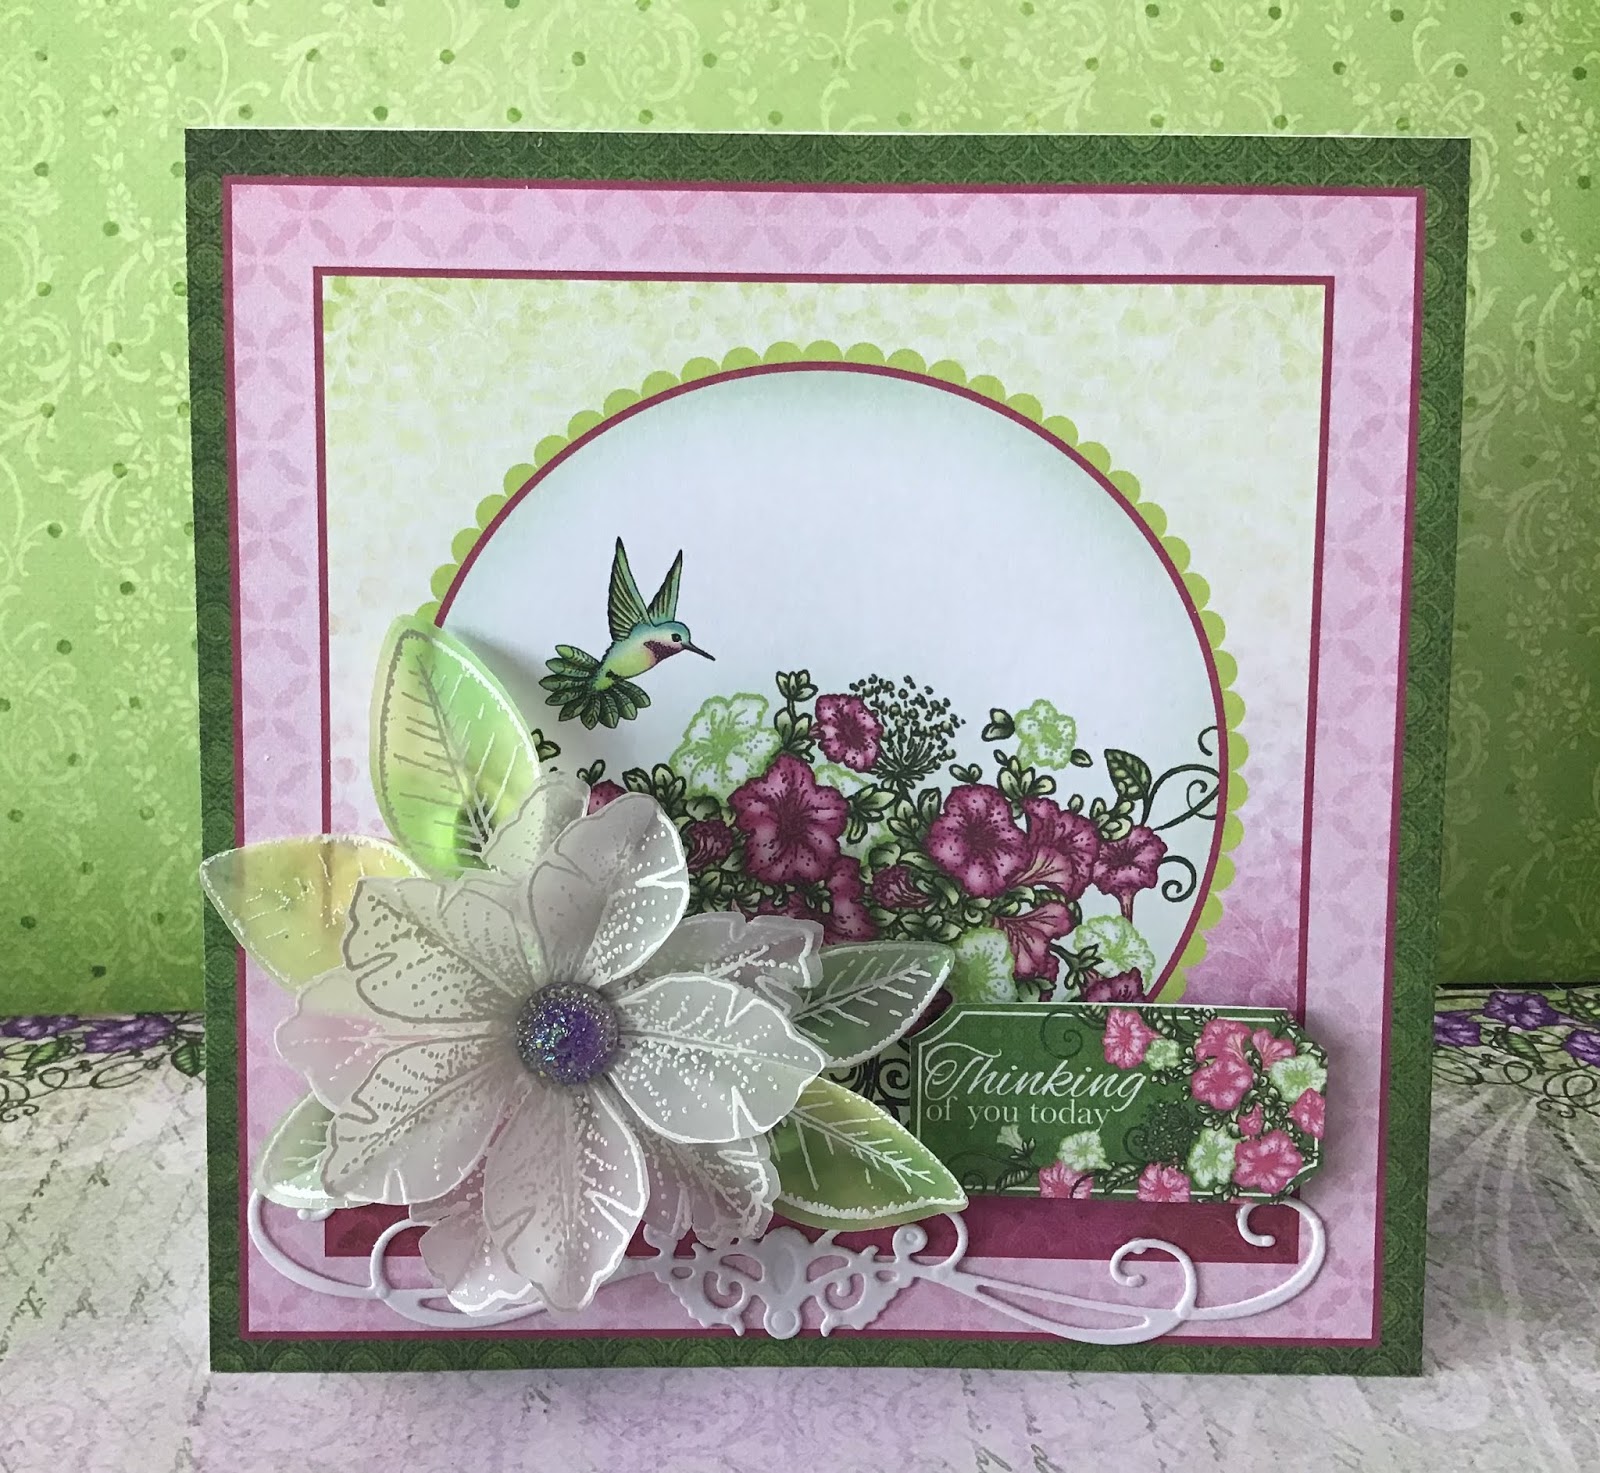
For the first card, I used one of the pieces of paper from the Heartfelt Creations sweet peony paper pack. I just LOVE the pretty papers in this pack, and they make it so easy to put pretty cards together once you ahve made the flowers.
When I make flowers, I always make quite a stash, and store them in cellophane bags in a large flat plastic container.

The steps below show hoe I stamped and coloured die-cut the sweet peonies.


I use a dauber to colour the stamped flowers before die-cutting them with the co-ordinating dies. This makes colouring much faster.


After die-cutting, I placed the flowers into the basics flower mould and very lightly spritzed them with water. Then the mould was rolled through my Big Shot machine, using the prescribed stack.

The flowers were then placed face-down onto a foam flower-shaping mat en lightly shaped with a flower-shaping ball tool so the petals would curl. The next step was to turn them face upside and press down in the middle with the ball tool to help the petals stand up.

Two layers of flowers were glued together and some small pearls added to the centre.

I hope you enjoyed your short stay and that you will take a few seconds to leave me a comment.

I am entering these cards for the Seize the birthday challenge. Hop over and see some lovely inspirational projects http://seizethebirthday.blogspot.com/

Seize the Birthday

 Remember that if you follow me by e-mail, you will always receive a notification of new posts. if you follow several other blogs, you can click on Follow in the top right-hand corner and view my blogs when you are alerted.

Crafty hugs

Marie Smith

Thank you with dainty vellum flowers


These pretty pink petunias are perfect to say "Thank you", "I am thinking of you", "Happy birthday" or "Hoping you feel better soon". I made this card to say thank you to someone for a special treat.

The steps below explain how to make the vellum flowers for the card. While I was busy with them, I also made some in clear acetate - heat embossed but not coloured.


Heat emboss several small and large classic petunias with Versamark ink and superfine white embossing powder onto heavy vellum paper.

Colour the vellum flowers at the back with Ranger archival ink vibrant fuchsia and a dauber.


Use a deep green ink such as Artistry green garland to colour the leaf sets.
Cut out the flowers and leaves using the co-ordinating dies.

 Pinch the petals of all the flowers on the middle line of each petal to shape. The photo shows both vellum and acetate flowers.

 
Layer two flowers of the same size onto each other. I found that a hot glue gun works best for the acetate. Finish the flowers with a crystal-like centre.


Die-cut the square element and the sentiment from the butterfly kisses die set in white cardstock.

Assemble the card by gluing the square element onto the printed paper. arrange and adhere the flowers and leaves. Add the sentiment and the dew drops last.

I hope you like the card and taht you will take a few seconds to leave me a comment.

Have a great day

Marie Smith