Wednesday, 23 December 2020

Serene single page layout

 This layout is, to me, the ultimate serene background for a variety of photos to preserve your memories.

 
The Serenity papers by Lemoncraft are so beautiful, that I did not want to apply too many techniques, so that the details on the paper would be the main feature on this layout. 

I used a die-cut cardstock frame - using a Heartfelt Creations die and a pice of light grey cardstoock for positioning the single photo.

Fussy-cut elements from the page with elements for cutting out and a few paper flowers and die-cut leaves were the only embellishments.

Happy crafting, until next time.

Marie Smith


Pocket recipe book in wooden box


If you love cooking and preparing meals, your recipe book HAS to be FUN, easy to use and easy to store.

Large album rings were used for this album, so that you can add as many pages as you want or need. To ensure that the recipe book stays clean and is easy to store, there are “pockets” on many of the pages in which you can insert recipe cards, take them out while you cook and put them back. You can also adhere recipe cards straight onto some of the pages.

The wooden box allows for easy upright or flat storage. A pen is stored on the inside to be ready when you need it to make notes or write down a recipe.


For This Project You Will Need:

·        Fabscraps C125 Meals in heels 30x30 paper pack

·        Fabscsraps C125 Meals in heels (8x8 inch) cardstock paper pack

·        Fabscraps C125 Meals in heels large sticker set

·        Fabscraps metal charms

·        Fabscraps Meals in heels recipe album

·        Fabscraps clear glue


Other materials:

·        2 large album rings

·        1 piece 20x20cm chipboard (for additional cover in front of recipe album)

·        Hit glue gun for adhering metal charms

·        Wooden book box (available at major stationers and craft stores in South Africa)

·        Light grey acrylic paint

·        Clear gesso

·        Paper flowers, chipboard twigs and die-cut leaves

·        Paper trimmer or guillotine, scissors


Instructions:

1.      Paint the wooden book box inside with acrylic paint. Allow to dry and paint outside. Leave to dry completely.

2.      While the box is drying, cut a “cover” for the front of the wooden book box from one of the sheets in the 30x30cm paper pack. Paint it on one side with clear gesso (to prevent it from curling and buckling). When dry, paint on the other side and leave again to dry completely. When the gesso is completely dry, adhere the paper to the outside front cover of the book box with Dries clear glue, Tacky glue or thick gem medium.

3.      To fill the extra space in the wooden book box, make a small box from chipboard, cover with printed paper. Tie two pieces of elastic cord around to hold a pen. Adhere the box to the inside of the wooden book box as shown in the pictures.

4.      Cover the chipboard album pages on one side with printed paper from the collection, after measuring and cutting to size. It is helpful to trace the around the tabs of the chipboard. Alternate cooking-theme apers and papers from the plain cardstock pack.

5.      Use a punching tool to cut holes in the scrapbook paper in the exact position as the holes in the chipboard pages.

6.      Turn around and cover the reverse sides of the chipboard pages with printed paper/plain cardstock. Remember to cut the additional piece of cardstock to the same size as the square that comes as part of the recipe album. Cover that on both sides as describes and make holes for the rings.

7.      Prepare additional pages for your recipes by cutting them in squares the same size as the square chipboard page. Make “pockets” for inserting recipe cards by cutting paper strips that are the same width as the chipboard pages and 8cm high. Adhere these to the paper pages with glue ONLY at the left, bottom and right-hand sizes. This will leave an opening at the top, into which you can insert recipe cards and/or cooking tips.

8.      Insert the rings into all pages to make up the recipe book.

9.      Decorate inside pages and write recipe categories (e.g. Casseroles, Pies, Veggies, Sweets, etc.) on the chipboard page tabs.

10.   Lastly, decorate the front cover.

11.   Insert recipe cards into packets and write recipes on some plain pages.


I hope you likes it and that you are inspired to create your own recipe book in a wooden box. This paper collection is unfortunately a sell-out at Fabscraps, but The Purple Magnolia will soon have two awesome cooing-themed paper packs by lemoncraft in stock.

Remember that y7ou can Follow my blog posts by clicking on the Follow button in the top-right-hand corner of this page. If it is more convenient to receive my blogs by e-mail, simply type your e-mail address in the Subscribe block.


Happy crafting, until next time.

Marie Smith


 e

LOVE - Circle of life single scrapbook page

 This layout that focuses on love, two young people exchanging wedding vows, features my new daughter-in-law's favorite colours - purple and turqouise.


I used Fabscraps C128 Circle of life papers and did lots of fussy cutting from the beautiful sheets of paper.

The chipboard gate is exclusively available from www.purplemagnolia.co.za. It was heat-embossed with Lindy's gang mixed media embossing powder, also available from our online store. 

The chipboard swirls were coloured with purple craft ink and dry-brushed with Prima opal magic rose gold.

Texture was added by adhering purple glass seed beads, lilac mini flower pearls, gauze coloured with a purple shimmer spray and paper flowers.

Mentioned products can be found in our online store by clicking on the links given for the products.

If you liked this, please give me a shout out. To ensure you never miss a post, you can enter your e-mail address in the Subscribe block in the top right-hand corner of this page, or you may click on the Follow button.

Happy crafting, until next time.

Marie Smith

Elegant silver and white for Christmas


I love the elegance of white and silver for Christmas.


I used silver Letterpress ink in the cut-and-emboss folder, but any thick metallic ink pad, applied with a brayer, should work well. I cleaned my embossing folder with clear stamp cleaner.
A piece of Fabrika vellum with silver foiled drops was inserted behind the opening created by the folder.
The heat-embossed vellum poinsettias were created using my most favourite set by Heartfelt Creations, but it is sadly retired.
Find several cut-and-emboss folders in our online store by clicking on the link 
Happy  rafting, until next time.
Remember that you can ensure you do not miss any posts by subscribing to receive information by e-mail. Just enter your e-mail address in the  the subscribe block on the right of this page.

Thursday, 10 December 2020

Raspberry garden with a touch of rose gold

 Make and give cards that ‘pop’ with colour and texture.


Start with pretty printed papers such as our Lemoncraft raspberry garden paper pads (The Purple Magnolia is the importer for Lemoncraft) on a card base. You can distress the edges with a distress tool or with scissors. Add stencilling with texture paste. I used The Purple Magnolia stencil S004, designed for us by Suzanne Smith Du Plessis, our talented designer. Next, add a die-cut that is ‘lifted’ with foam tape for dimension. I used Lady E Design doily die. Decorate the card with fussy-cut flowers and leaves and chipboard elements (exclusively designed for The Purple Magnolia), that are heat-embossed with rose gold embossing powder. Lastly, add a piece of tulle or gauze between the layers of flowers and leaves.


This is really an easy card with lots of interest and texture. All products are available in our online store.

Lemoncraft raspberry garden paper pack

Stencils by The Purple Magnolia

Chipboard elements by The Purple Magnolia

Monday, 7 December 2020

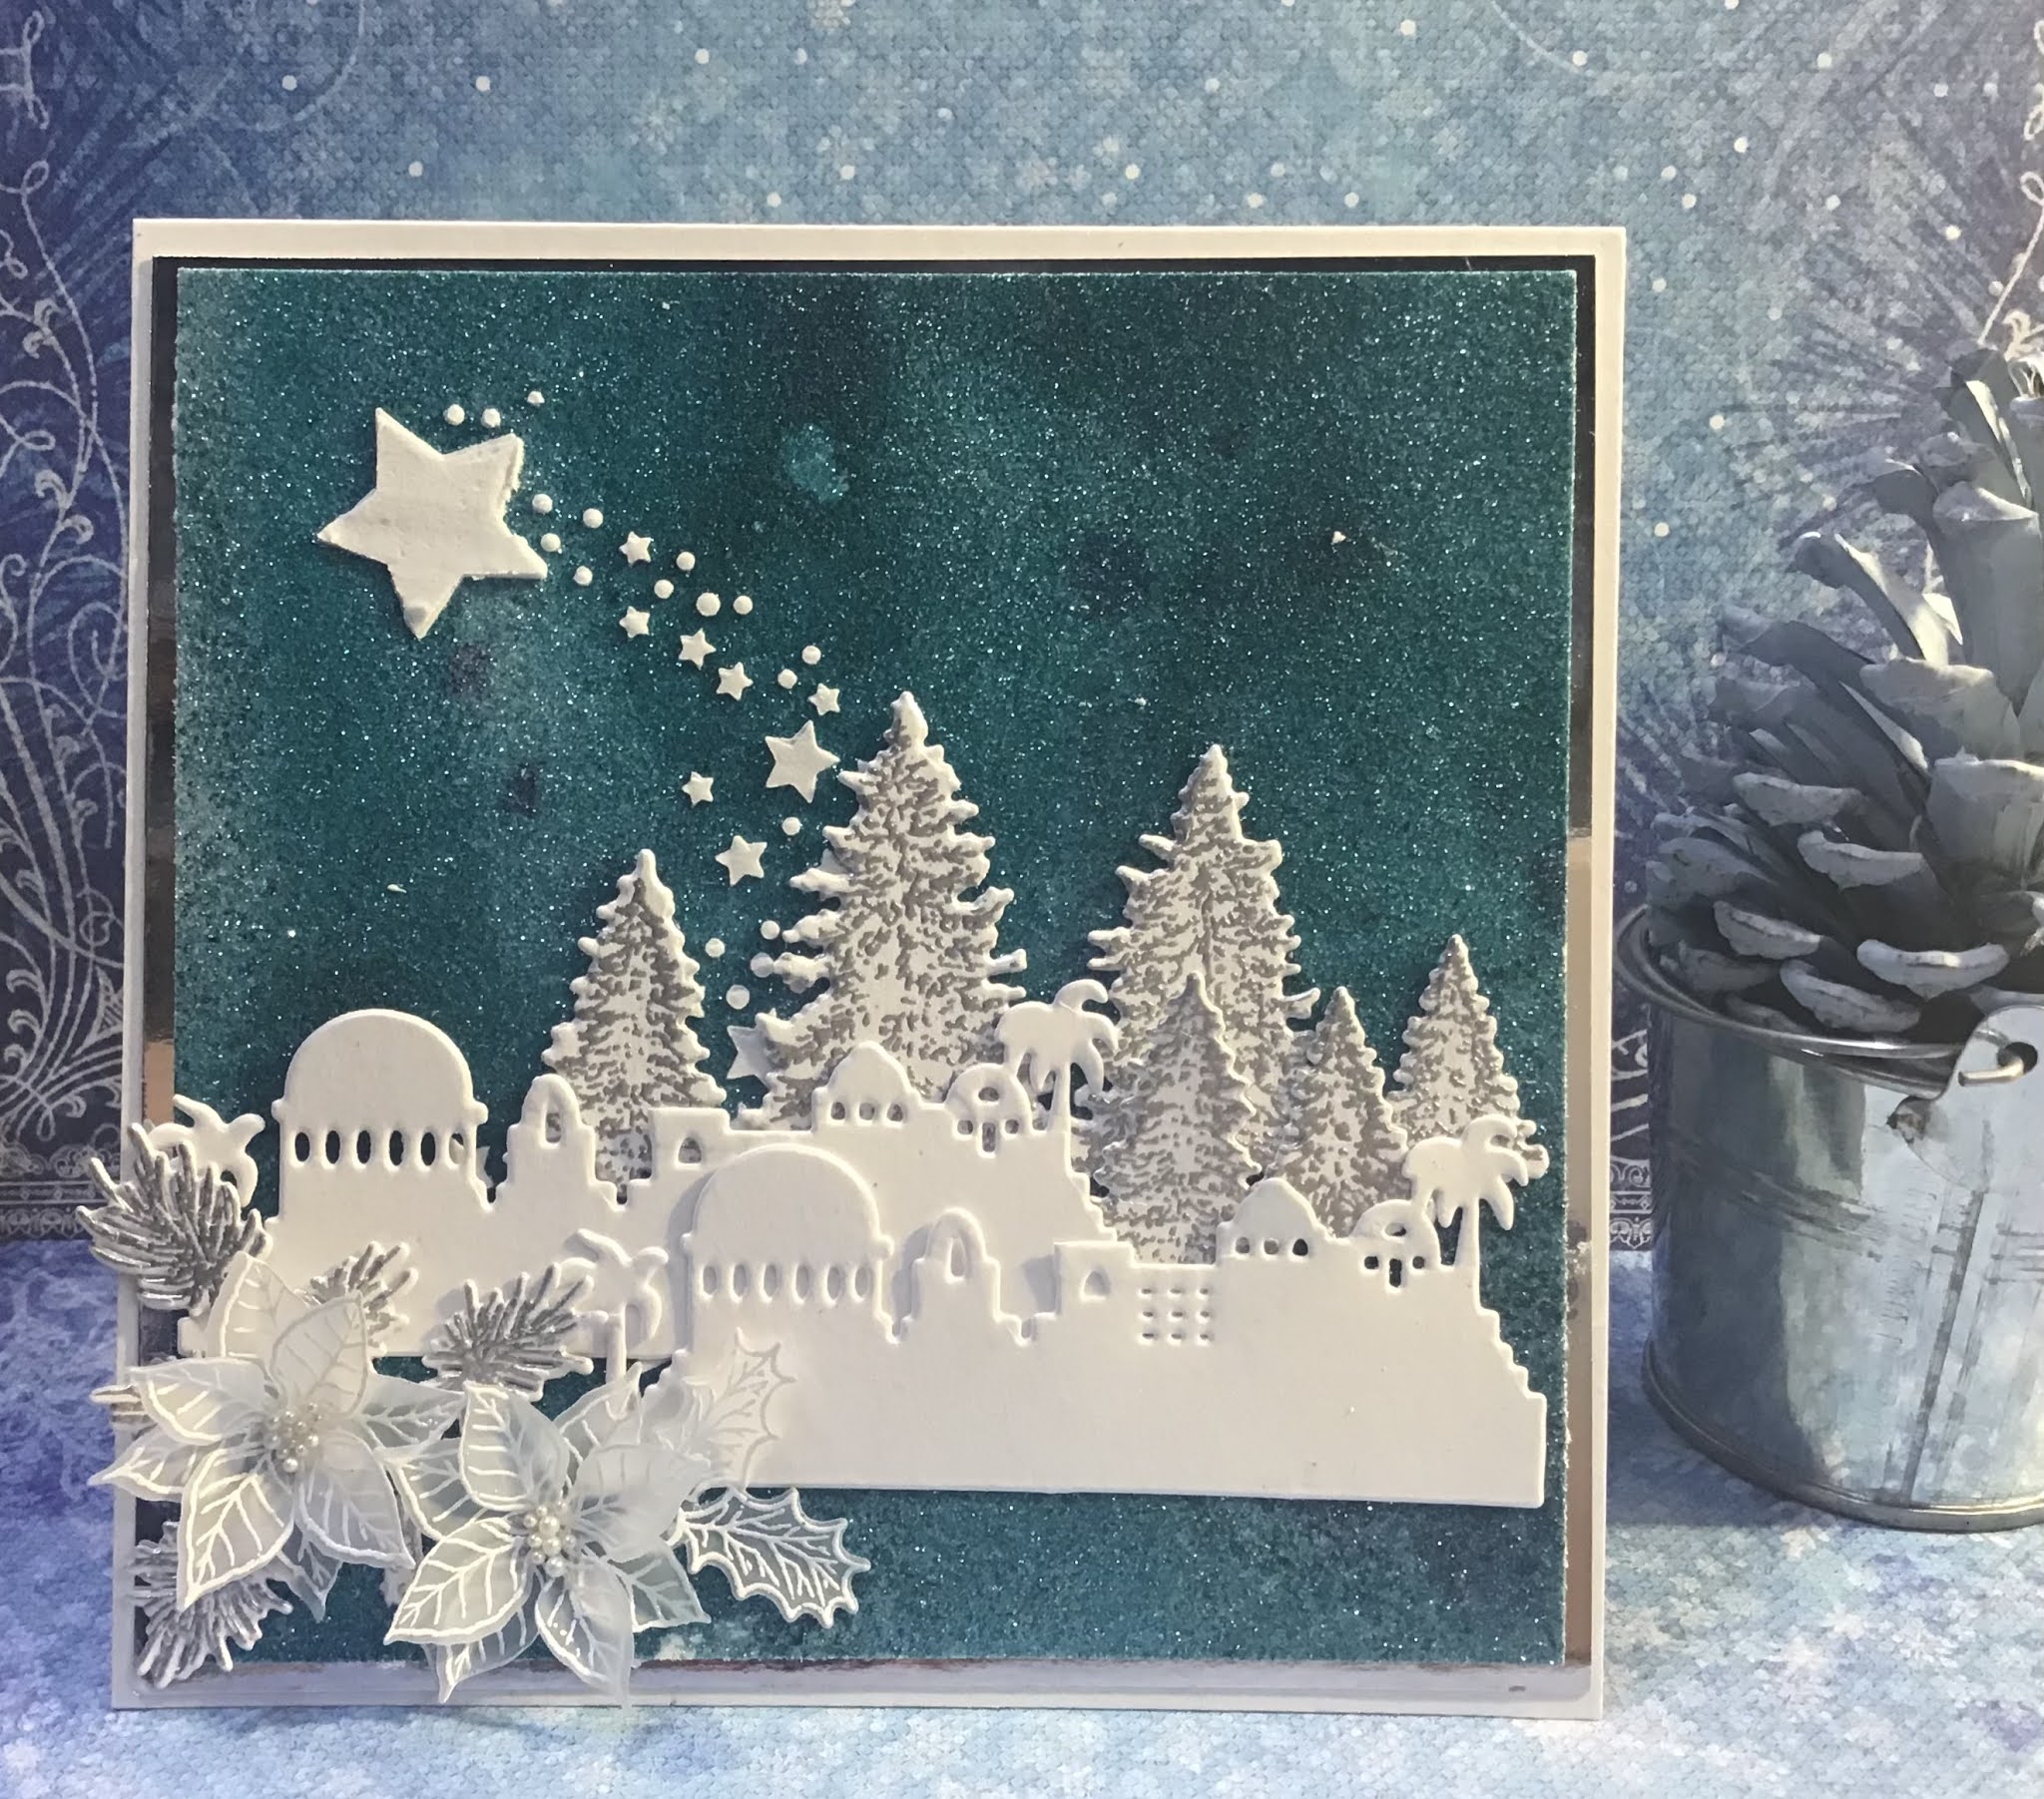
Shower of stars Christmas card


For today’s Christmas card inspiration, I tried a technique shown by Jennifer McGuire, applying alcohol ink to glitter cardstock. I used two shades of blue ink. When the ink was dry, I applied white texture paste through a stencil, designed for and available from The Purple Magnolia’s online store.

I used silver embossing powder to apply heat embossing technique to the Heartfelt Creations snowy village stamp and die set.the village die-cuts were created using Heartfelt Creations silent night dies.

Vellum poinsettias were created using Heartfelt Creations Christmas poinsettia stamp and die set.

Happy crafting, until next time.

Marie Smith


Raspberry garden explosion box


 Dear fellow crafters

I must admit, I have a bit of catch-up to do on this blog. This has been a strange year, but we are thankful for blessings, and for having you as followers - many of you are my followers on Facebook, my scrapbooking group and Instagram (#purplemagnoliashop). If you want to consistently be updated, do consider following me on those platforms too, as not all projects are turned into blogs.

For a long time, I wanted to create something pretty out of the Lemoncraft raspberry garden papers and today I am happy to share a project that gave me much pleasure in the creative process.  

I used half of the A4 paper pack- which, by the way, is absolutely pretty and perfect for 8x8 inch (20cm) mini albums. I used the Lady E Design cake die set and the Lady E Design doily die for creating the delightful cake inside the box. 

The pretty little foamiran flowers were created from THE BEST FOAMIRAN on the market, available from 14 Craftbar, and one of the dies in the Lady E Design small flowers die set.

I also used Lady E Design tags 1 die set to create a small tag to insert behind the fussy-cut envelope. Your personal message to the recipient can be written on the tag before it is slipped in behind the envelope, which is only glued down on the left, bottom and right hand sides.

On the lid and the inside flaps of the explosion box, I added small chipboard swirls and flowers, exclusively designed for and available from The Purple Magnolia.

if you need any of the products mentioned in this blog, please click on the links (words in blue text) to take you directly to the product in our online store.

Happy crafting, until next time. remember, if you enjoyed looking at this blog, please leave me a comment below.

Happy crafting, until next time.

Marie Smith