

Make a gardening journal/diary for yourself or one of the keen gardeners in your life.
I have always loved plants and gardening, but Covid-19 gave
even more meaning to the concept of creating our own garden sanctuaries. Many
years ago, Keith Kirsten published a garden planner in diary form. My garden
panner and recorder – though not nearly in the same format – was inspired by
the concept of planning and recording what goes on in my garden.
I created some pages on my computer, for adding to the
fabulously pretty papers in the Out and about collection. The names of
the sheets in the paper collection served as inspiration for my page titles for
recording various aspects in my planner. I added larger rings for the chipboard
mini album so that I can keep on adding pages as I need them, so I better keep
an extra pack or two of the papers to make this possible.


For This Project You Will Need:
·
FabScraps C135
Out and about paper pack
·
Fabscraps C135
chipboard mini album
·
Fabscraps DS135-02 leaves stencil
·
Ranger texture paste
·
Large album ring
closures
·
Prima acrylic
paint opal magic rose gold
·
Rose gold or
bronze shimmer powder
·
Printed pages to
record your planning and what goes on in your garden
·
Chipboard leaves
by The Purple Magnolia, coloured green with an ink pad
·
Page titles
(designed and cut out with my electronic cutting machine)
·
Paper flowers for
embellishing some of the pages
Instructions:
1.
Paint one part of
the die-cut mini-album cover with the opal magic paint. While still wet,
randomly rub in some rose gold or bronze shimmer powder.
2.
Trace the outline
of the die-cut cover onto one of the sheets from the paper pack (I used a green
for contrast) and fussy-cut it out. Adhere to the back of the die-cut cover. On
the back, apply texture paste through the leaves stencil. Allow to dry properly
before handling further.
3.
Design and cut
out titles for the pages of your planner. I was inspired by the names of the
sheets in the pack:
·
Out and about = Trips to the garden centre, to
by seasonal plants and items.
·
Splash of colour = Such lovely colour in my
garden (pictures of my favourite flowers as they bloom, with the name of the
plant and date of flowering)
·
Breathtaking = Very special
plants/flowers/corners in my garden (pictures of special plants, flowers or
spaces in my garden, with the name of the plant and date of flowering
·
Clean up = What to tidy up, per season
·
Ready for lunch = Veggie seeds or seedlings to
plant. During lockdown, I started growing veggies in pots in the back yard of
my townhouse garden)
·
In bloom = What grows bet in my garden every
season
·
Bucket of love = Gardening tips and care
·
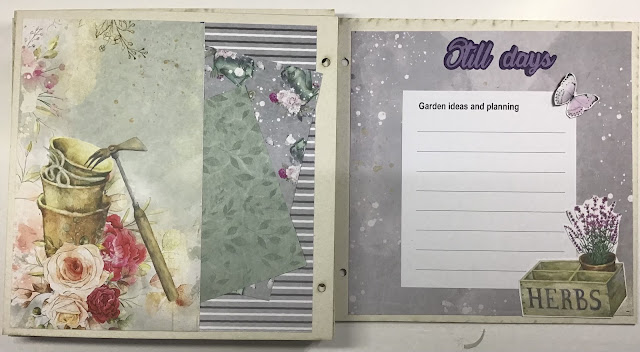
Still days = Garden ideas and planning, for
quieter times in the gardening cycle, or when I browse Instagram for gardening
ideas
4.
For each page in the planner, cut printed paper
19cm wide x 19,5 cm high and adhere to the pages. I used two pieces of
“off-cuts” to create pockets on some pages. Inro these I can slip seed packets,
notes or pictures.
5.
Add the planner prints that you designed (or
write them on white paper and adhere these to the printed papers.
6.
Embellish pages to your taste. Pictures below
serve as inspiration.
Happy crafting, until next time!
Marie Smith
No comments:
Post a Comment